Step-by-Step Guide to Purchasing Hosting
You do not always need a domain to buy hosting. This process covers all scenarios.
Step 1: Navigate to Hosting Products
-
Go to www.auroradigitz.com.
-
Click on the "Hosting" link in the main navigation menu.
-
You will see a page displaying our various hosting plans (e.g., Aurora Spark, Aurora Glow, Aurora Blaze).
Step 2: Select Your Hosting Plan
-
Review the features of each plan (e.g., Disk Space, Bandwidth, Websites, Email Accounts).
-
Click the "Order Now" button on the plan that best fits your needs.

Step 3: Configure Your Product
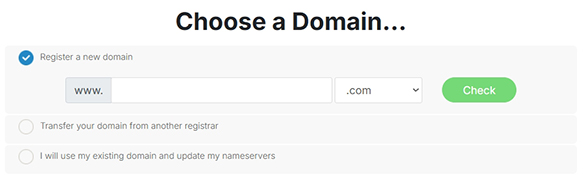
A. Domain Selection
This section determines which domain name will use this hosting account.
-
Register a New Domain: Choose this if you need to buy a new domain. Enter your desired domain name in the field (e.g.,
mybusiness) and select the TLD (e.g.,.com,.net). -
Transfer Your Domain to Us: Choose this if you own a domain at another registrar and wish to manage it with Aurora Digitz. You will need the domain's EPP/Auth Code.
-
I will use my existing domain and update my nameservers: Choose this if you already own a domain and plan to keep it at your current registrar. You will simply point it to our servers later.
B. Billing Cycle
-
Select Term: Choose how long you want to pre-pay for the hosting service. Options typically include:
-
Monthly
-
Annually (Often offers the best value)
-
Biennially (2 Years) or Triennially (3 Years)
-
-
The price will update automatically based on your selected term.
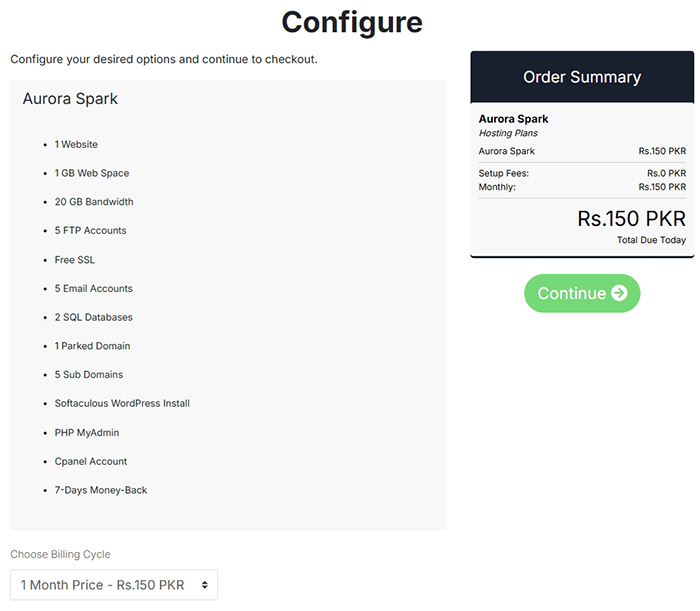
Step 4: Review & Checkout
-
After configuring your plan, click "Continue".
-
Review Your Cart: Ensure the selected plan, billing cycle, and add-ons are correct.
-
Click "Checkout".
Step 5: Account Setup & Payment
On the checkout page, you will complete your order.
Checkout Form Fields:
A. Client Information (For New Customers)
If you are not logged in, you will need to create an account or enter your details.
-
First Name / Last Name: Your full name.
-
Company Name: (Optional) Your business name.
-
Email Address: Crucial. This is your primary login and contact method.
-
Address / City / State / Postcode / Country: Your billing address.
-
Phone Number: For support and security verification.
-
Password: Create a secure password for your client area.
B. Payment Method
-
Select your preferred payment method (e.g., Credit Card, PayPal, Bank Transfer).
-
If paying by card, enter your Card Number, Expiry Date, and CVV securely.
C. Order Review & Finalization
-
Order Summary: A final overview of your purchase, including the first payment and any recurring fees.
-
Terms of Service: You must check the box to agree to Aurora Digitz's Terms of Service and Acceptable Use Policy.
-
Complete Order: Click the "Complete Order" button to submit your payment and place the order.
What Happens After Purchase?
-
Instant Provisioning: For most hosting plans, your account is set up automatically within minutes.
-
Welcome Email: You will receive a welcome email from
billing@auroradigitz.comorsupport@auroradigitz.com. This email is critical. It contains:-
A link to your Client Area
-
Your cPanel or hosting control panel login URL, username, and password
-
Your website's Nameservers (if you need to point your domain)
-
-
Access Your Services: Log in to the Aurora Digitz Client Area to manage your hosting account, view invoices, and submit support tickets.
Important Notes:
-
If you selected "I will use my existing domain," you must update your domain's nameservers to the ones provided in your welcome email at your current domain registrar.
-
The hosting service is active from the moment you receive the welcome email. You can immediately start uploading your website files.